Wednesday, May 16, 2012

Cookie Split Ice Cream Sandos

I've been making these two tone cookies for years, ever since I borrowed the idea from a lil sandwich shop back home: http://openfacesandwicheatery.com/. I just use my favorite chocolate chip cookie recipe, divide the dough in half, and add cocoa powder to one half. 

Today I decided to turn these bad boys into ice cream sandwiches!  We've been having unusually nice weather in Portland so the ice cream was a tad melty.  You can customize these by spreading Nutella or a nut butter on the cookies before sandwiching them, rolling the edges in sprinkles/nuts/chocolate chips/candy, or switching up the ice cream flavor.

  • 1 cup butter, softened
  • 1 cup packed brown sugar
  • 1/2 cup granulated sugar
  • 1/2 teaspoon baking soda
  • 2 eggs
  • 1 teaspoon vanilla
  • 2 1/2 cups all-purpose flour (or the gluten free blend, in my case)
  • 1, 12-ounce package (2 cups) semisweet chocolate chips 
  • 2 Tbs cocoa powder
  • 1.5 quart container vanilla ice cream
In a large mixing bowl beat butter with an electric mixer on medium to high speed for 30 seconds.  Add brown sugar, granulated sugar, and baking soda.  Beat until mixture is combined, scraping sides of bowl occasionally.  Beat in eggs and vanilla until combined.  Beat in as much of the flour as you can with the mixer.  Stir in any remaining flour.  Stir in chocolate chips.  


Put half the dough in a separate bowl and mix in cocoa powder.  Use a cookie scoop (I have a #40 scooper) to ball up the light dough, then follow up with the dark.  Take one ball of each flavor and roll into one large ball.  Place on a cookie sheet with the seam in the middle.  *I like to freeze my cookie dough balls before baking...the final product is fluffier!* Bake @ 350F for 15-17 minutes. 


Let cookies cool and scoop vanilla ice cream onto flat side of one cookie, then top with a second cookie.  Wrap in plastic wrap or parchment and store in freezer until ready to eat. 


Aaaaand I'm off to the gym.

Sunday, May 13, 2012

Matcha Cream Cheese Frosting

This weekend was all about trying new things.  I got to use my new cupcake corer, my new cupcake caddy, and try my hand at matcha buttercream! Matcha is a finely ground, powdered green tea that has amazing health benefits because you're consuming the entire tea leaf, rather than just water that was infused with the leaf. 

Since I'm all organic and natural in the rest of my life, I've decided to cut down on food dyes in my baking, which is really only occurring in frosting at this point.  One of the first tips I read about was using matcha as a natural green food coloring.  That, combined with dessert day at work, and an extra package of cream cheese in the fridge =  this frosting.  I put it on top of a vanilla cupcake filled with lemon curd.  Yum!

This made enough to frost 2 dozen cupcakes comfortably, but probably 1 dozen if you're piling them high with frosting:)

Ingredients:


1 cup (2 sticks) unsalted butter, room temperature
8 oz package cream cheese, room temperature
3 cups powdered sugar
1T matcha

Preparation:


Sift the powdered sugar and matcha together. 

In a mixer fitted with the whip attachment, whip the butter and cream cheese together until creamy.  Slowly add in the sifted powdered sugar/matcha and whip until no lumps remain, scraping bowl as necessary.

Store in the refrigerator if not using immediately. 

No artificial dyes here!


It's that easy. 


PS - this was also on my weekend agenda.  You've got to love Oregon:)

Tuesday, May 8, 2012

Happy Birthday, Curry!


Ever since naming Coconut, we were searching for her perfect Curry. He's our little trouble maker, and he just turned two!  Curry is the type of cat who will wake you up in the middle of the night -- by swatting something from the dresser onto your head -- because he had decided it's time for wet food.  He tries to escape every time we open the apartment door and unfortunately for him, has never made it further than the basement.  Happy 2nd Birthday, Curry!


Curried Tofu


1 block of organic extra firm tofu, drained and pressed overnight
~1/2 of a 15 oz. can coconut milk
1 garlic clove, grated
1 T curry powder
1 T soy sauce or Bragg's Liquid Aminos
Coconut oil, for frying


Dice tofu into 1" cubes.  Combine the coconut milk, grated garlic, curry powder, and soy sauce/Bragg's. Add tofu and stir to coat.  Marinate for a few hours, then fry it up in some coconut oil, making sure all sides are browned evenly.  These would work well skewered on the grill, too!  Serve over rice, on salad, or in a stir fry.


Wednesday, May 2, 2012

Chocolate Macaroons with Orange Ganache

This was not my first time making French macaroons.  It was, however, my first successful time.  The key? Sifting the nut/powdered sugar mixture well and not using a huge tip to pipe the macaroons. 

I made a few changes to this recipe.  You'll notice the people who comment on Epicurious are an angry bunch of folks.  I do not feel I'm too good for this recipe and was overall very happy with it.  I whipped all of the egg whites rather than stirring in unwhipped whites at the end and I halved the amount of cloves in the ganache as recommended in the reviews. 

Cookies:
  • 2 cups powdered sugar, divided
  • 1 1/4 cups slivered almonds
  • 3 tablespoons natural unsweetened cocoa powder
  • 3 egg whites, room temperature
  • 1/4 cup sugar

Ganache:
  • 3 1/2 ounces bittersweet chocolate, finely chopped
  • 2 tablespoons (1/4 stick) cold unsalted butter, cut into 1/2" cubes
  • 1/2 cup heavy cream
  • 1 tablespoon finely grated orange zest
  • 1/4 teaspoon ground cloves
  • 1/8 teaspoon ground allspice
  • 1/8 teaspoon kosher salt


Preparation


For cookies:

Arrange racks in lower and upper thirds of oven; preheat to 325°F. Line 3 baking sheets with parchment paper or Silpat. Pulse 1 cup powdered sugar and almonds in a food processor until nuts are very finely ground (but not to a paste.) Add cocoa powder and remaining 1 cup powdered sugar; process to blend well. Sift mixture through a medium-mesh strainer into a large bowl; discard larger almond pieces remaining in strainer (if more than 1 tablespoon remains, pulse nuts again in processor and re-sift.)

Using an electric mixer, beat egg whites in a medium bowl on medium speed until white and frothy, about 1 minute. With mixer on medium-low speed, gradually add sugar by tablespoonfuls. Increase speed to medium-high; beat until firm peaks form. 

Fold dry ingredients into meringue in 2 additions, mixing well between additions. 

Spoon meringue into a pastry bag fitted with a 1/4" tip and pipe quarter size rounds onto 2 of the 3 prepared baking sheets, spacing 1" apart. Let stand until tops appear dry, about 10 minutes.
Bake cookies, rotating sheets halfway through baking, until puffed and dry, about 16 minutes. Slide cookies on parchment onto a wire rack. Let cool completely. Repeat with remaining batter on third baking sheet. 

For ganache:

Place chocolate and butter in a medium bowl. Bring cream just to a boil in a small saucepan over medium-high heat. Remove from heat; stir in orange zest, cloves, allspice, and salt. Pour hot cream mixture over chocolate and butter; whisk until smooth. Refrigerate until firm, about 20 minutes. 

Spoon ganache into a pastry bag fitted with a 1/4" tip. Pipe about 1 teaspoon ganache onto flat side of 1 cookie, leaving 1/4"–1/8" plain border. Top with a second cookie, flat side down. Repeat with the remaining cookies and ganache

Store in the refrigerator and bring to room temperature before serving.


Saturday, April 21, 2012

Happy Birthday, Coconut!

Cat person vs. crazy cat lady?  You decide.  Coconut (my first born, if you will) is turning 2 today, and I am baking coconut cream pie in celebration!

Joe and I had no intention of getting a cat that soon.  It was the day after we got back to Portland after driving Ruby (my awesome red Civic) cross country and we were running errands when we stumbled upon a pet adoption event.  Coconut (then Artemis) had literally wedged half of her body out of the cage in attempt to get close to us, and when I asked to hold her, she fell asleep in my arms!  How could we say no? I had to fight off a five year old, but we became a family of 3 that day.

Happy Birthday to my bob-tailed, catnip-loving Queen!

PS - all of our cats are named after food.  You can expect appropriately themed posts when Curry and Cashew's birthdays roll around.

 Coconut Cream Pie


Back in the day, I hated custards (ridiculous, I know.) This was one of the first pies we learned in pastry school and it changed my mind completely.  Today I used a gluten free pie crust and adapted the filling recipe from here, and voila!-- Coconut Cream Pie for Coconut's birthday.

 Ingredients

1 blind-baked 9-inch pie shell (for gluten-free, I used the pie crust recipe on Pamela's GF bread mix)

2 1/4 cups whole milk
3/4 cup sugar
3 egg yolks
1/4 cup cornstarch
1 teaspoon vanilla
1 3/4 cups sweetened flaked coconut
1 tablespoon butter

1 cup heavy cream
powdered sugar to taste
pure vanilla extract to taste

 Directions

In a saucepan, whisk  2 cups of the milk and 1/2 cup of the sugar together. Place the pan over medium heat and bring the liquid up to a simmer.

Whisk the cornstarch and 1/4 cup remaining sugar together until no clumps remain.  Whisk in egg yolks and remaining 1/4 cup milk until smooth. Temper the hot milk into the egg yolks. Whisk the egg mixture into the hot milk mixture.  Bring the liquid up to a boil and reduce to a simmer. Cook the mixture, stirring constantly, until the filling is thick, about 4 to 6 minutes. (Optional: strain your mixture at this point.  The egg has a tendency to cook unevenly and this will eliminate any chunks.) Fold in the vanilla, coconut, and butter. Mix well. Pour the filling into the prepared crust, press plastic wrap directly on filling (this will prevent the cornstarch from forming a "skin"), and cool the pie completely.

Flavor the heavy cream with powdered sugar and vanilla (or other extract) to taste. Using an electric mixer with a whip attachment, whip the cream to stiff peaks, being careful not to over-whip.  Spread or pipe the whipped cream over the top of the pie.

Saturday, April 14, 2012

Dear Martha... (classic yellow cake batter/Swiss meringue buttercream)

Are you there, Martha?  It's me, Emily.  I know we don't have a mutually beneficial relationship.  In fact, you'd probably hate me seeing as I let my cat drink milk from my cereal bowl and I often leave the dishes for the next morning.  But you know what?  I don't like you trash talkin' my girl Rachael Ray, so maybe we'll call it even?

Thanks for the delish yellow cake recipe you recently published in Everyday Food and the Swiss meringue buttercream from your cupcake cookbook.  Work birthday parties wouldn't be the same without them.

XOXO,

Emily

Classic Yellow Cake Batter

You could actually turn this into a cake, but I'm going the cupcake route.  If you'd prefer a layer cake, use 2, 9-inch round cake pans lined with parchment paper and buttered.  Divide the batter among the two pans and bake about 30 minutes. 

I've recently discovered powdered buttermilk.  I know, I know, it's not 1950, but I'm sick of buying a quart whenever I make scones and pouring the leftovers down the drain a few weeks later.  Try it!

Remember that we're making meringue buttercream after, so don't throw away your extra egg whites.*

1 cup (2 sticks) unsalted butter, room temperature
1 3/4 cups sugar
4 large eggs plus two large egg yolks*
1 Tbs pure vanilla extract
3 cups cake flour (I've been using my GF mix), spooned and leveled
1 Tbs baking powder
1/2 tsp fine salt
1 1/2 cups buttermilk

Bring cold ingredients to room temperature.

Preheat oven to 350 F.  Line 24 standard muffin cups with paper liners. 

In a large bowl, using an electric mixer, beat butter and sugar on high until light and fluffy, about 6 minutes.  Beat in whole eggs and egg yolks, one at a time, until combined.  Beat in vanilla extract.

In another large bowl, whisk together flour, baking powder, and salt.

With the mixer on low, add 1/3 of the flour mixture to butter mixture, beating to combine.  Beat in 3/4 cup buttermilk, another 1/3 the flour mixture, another 3/4 cup buttermilk, and the remaining flour mixture until just combined.  Scrape down bowl as needed. 

Divide batter among muffin cups.  Bake until a toothpick inserted in center of a cupcake comes out with a few moist crumbs attached, about 20-25 minutes.

Swiss Meringue Buttercream

It's easier than Italian meringue and approximately a million steps up from the powdered sugar and shortening buttercream we grew up on.

5 large egg whites
1 cup plus 2 Tbs sugar
pinch of salt
1 pound (4 sticks) unsalted butter, cut into tablespoons, room temperature
1 1/2 tsp pure vanilla extract

Combine egg whites, sugar, and salt in the heatproof bowl of a standing mixer set over a pan of simmering water.  Whisk constantly by hand until mixture is warm to the touch and sugar has dissolved (the mixture should feel completely smooth when rubbed between your fingertips.)
Oregon Duckcakes

Attach the bowl to the mixer fitted with the whisk attachment.  Starting on low and gradually increasing to medium-high speed, whisk until stiff (but not dry) peaks form.  Continue mixing until the mixture if fluffy and glossy, and completely cool (test by touching the bottom of the bowl), about 10 minutes.

With the mixer on medium-low speed, add the butter a few tablespoons at a time, mixing well after each addition.  Once all the butter has been added, whisk in the vanilla.  Switch to the paddle attachment, and continue beating on low speed until all air bubbles are eliminated, about 2 minutes.  Scrape down sides of bowl with a flexible spatula, and continue beating until the frosting is completely smooth.  Keep buttercream at room temperature if using the same day, or transfer to an airtight container and refrigerate up to 3 days or freeze up to 1 month.  Before using, bring to room temperature and beat with paddle attachment on low speed until smooth again, about 5 minutes.

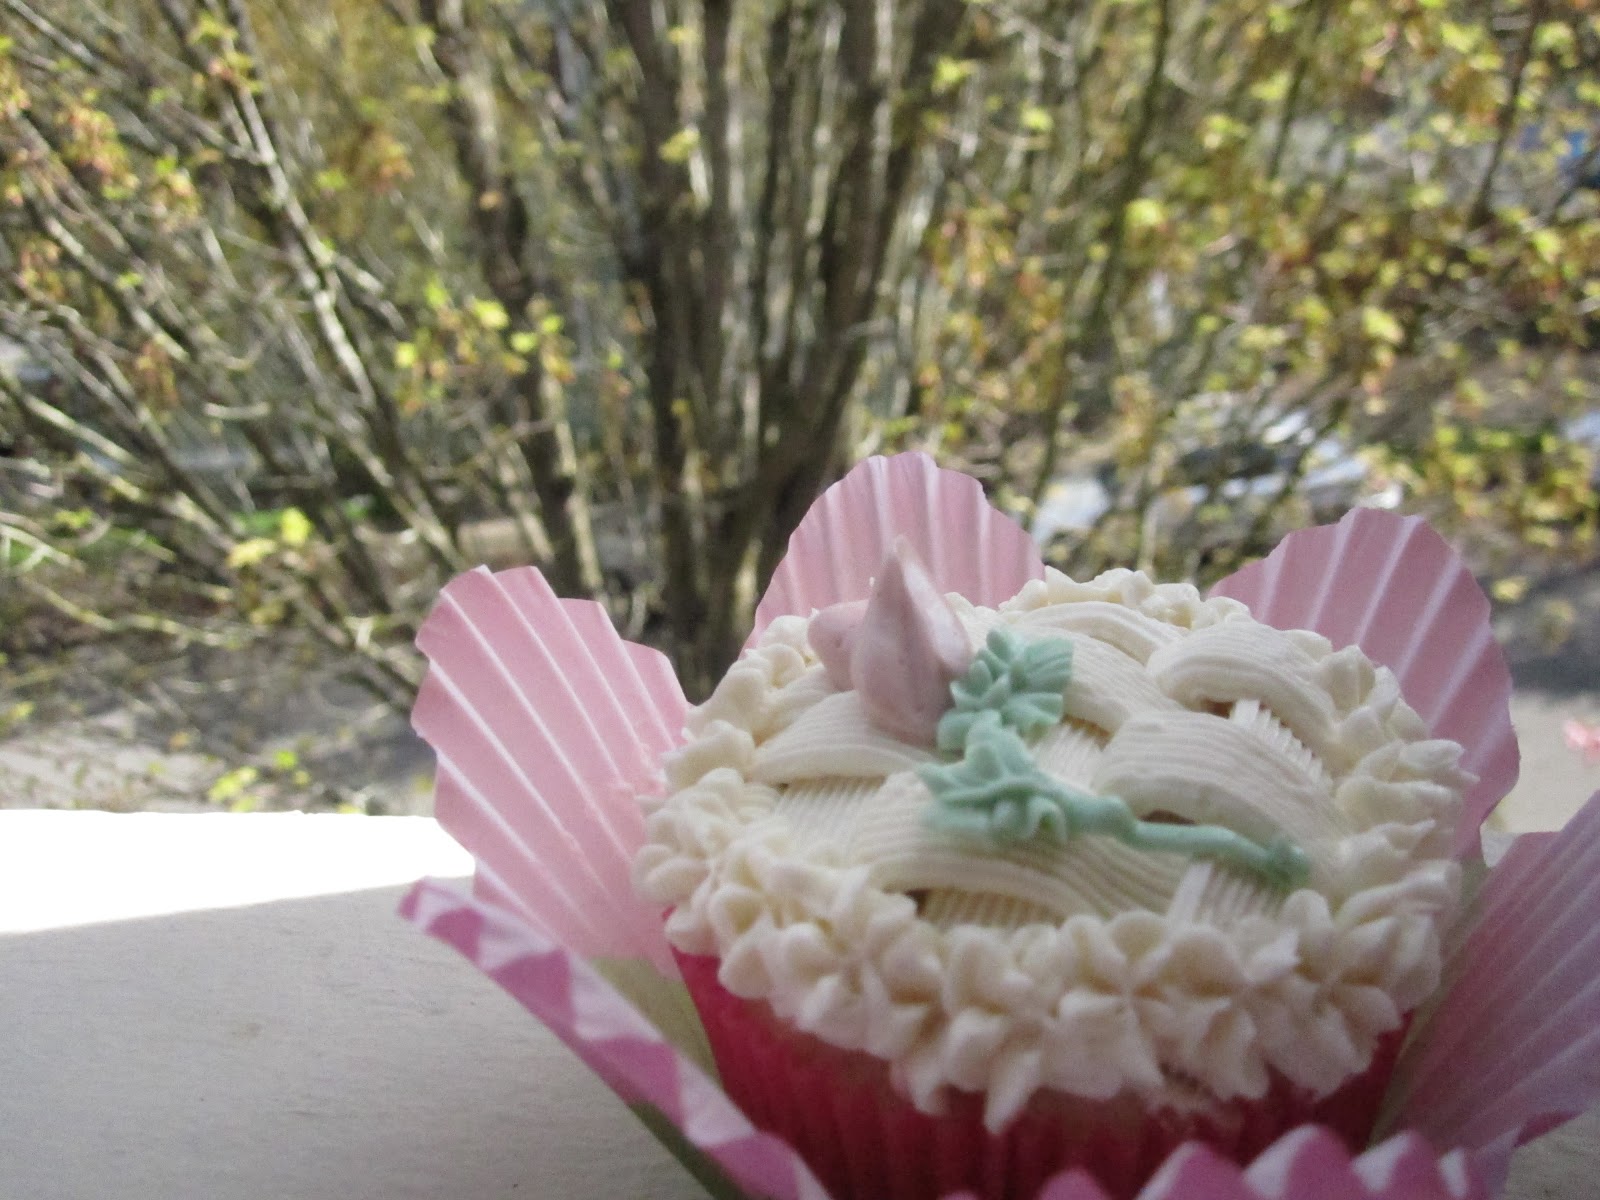
Flower Basket Cupcakes

Thursday, April 12, 2012

Toffee Crunch Cookie Brittle

When I was little (and adorable), I thought Heath Bars were "Health" Bars.  Once I figured out how to read and discovered that Heath Bars were in fact not Health Bars and that toffee was not coffee, I came to fully appreciate the delicious candy bar.

PS - what's not to love? They share a name with:
  1.  Heath Ledger (muah!) I'll always love a man with curly hair. 
  2. Ben & Jerry's Vanilla Heath Bar Crunch Ice Cream.  Oh, you didn't realize they made more than Coffee Heath Bar Crunch? I would like to thank my summer scooping overpriced ice cream at minor league baseball games for that discovery. 
  3. My sister's new boyfriend (!) who will have to listen to me reference Mr. Ledger and Heath Bars every time I say his name for the rest of his life. I apologize.
This recipe is from a cookbook called "Big Fat Cookies" by Elinor Klivans.  And yes, sometimes I read it in bed instead of an actual book.  Normally I'm skeptical of cookies without eggs, but my friend Dan wanted to make these for his mom when we were in college, and I couldn't get enough.

1 1/2 cups unbleached all-purpose flour (gluten free flour mix works here, too)
1/2 tsp baking soda
1/2 tsp salt
3/4 cups (1 1/2 sticks) unsalted butter, melted and cooled slightly
1/2 cup granulated sugar
1/3 cup packed light brown sugar
1 tsp vanilla extract
1 1/2 cups (about 7 oz) crushed chocolate-covered toffee, such as Heath Bars or Skor *
1 cup (about 4 oz) walnuts, broken into large pieces

* You can also buy packages of Heath Toffee Bits in the baking aisle.  They come in 8 oz bags and I figure a little extra toffee never hurt anyone, right? (Diabetics excluded.)

Position a rack in the middle of the oven.  Preheat the oven to 350°.  Line a baking sheet with parchment paper or a Silpat.

The dough will look crumbly.
In a medium bowl, stir the flour, baking soda, and salt together; set aside.  In a large bowl, whisk the melted butter, granulated sugar, brown sugar, and vanilla until smooth, about 30 seconds.  Use a large spoon to stir in the flour mixture.  The dough should look smooth.  Stir in the crushed toffee and walnuts.  The dough will look crumbly.

Leaving a 1 to 1 1/2-inch border empty on all sides, spoon the dough onto the prepared baking sheet.  Press the dough into a rectangle that measures about 9x13 inches and is about 1/2 inch thick, then use the palms of your hands to pat it into an even layer.

Bake until the top feels firm and looks dark golden and the edges look light brown, about 19 minutes.  Let the cookie brittle cool on the baking sheet for 10 minutes, then use a large metal spatula to slide the cookie onto a wire rack to cool.  (Don't worry if the cookie breaks; it will be broken into pieces when cool.)  The cookie will become crisp as it cools.

Break the cooled cookie into 4- to 5-inch pieces.  The cookies can be stored in a tightly covered container at room temperature for up to 4 days (but they won't last!)


Makes about twelve 4- to 5-inch long irregularly shaped cookies.