Saturday, April 21, 2012

Happy Birthday, Coconut!

Cat person vs. crazy cat lady?  You decide.  Coconut (my first born, if you will) is turning 2 today, and I am baking coconut cream pie in celebration!

Joe and I had no intention of getting a cat that soon.  It was the day after we got back to Portland after driving Ruby (my awesome red Civic) cross country and we were running errands when we stumbled upon a pet adoption event.  Coconut (then Artemis) had literally wedged half of her body out of the cage in attempt to get close to us, and when I asked to hold her, she fell asleep in my arms!  How could we say no? I had to fight off a five year old, but we became a family of 3 that day.

Happy Birthday to my bob-tailed, catnip-loving Queen!

PS - all of our cats are named after food.  You can expect appropriately themed posts when Curry and Cashew's birthdays roll around.

 Coconut Cream Pie


Back in the day, I hated custards (ridiculous, I know.) This was one of the first pies we learned in pastry school and it changed my mind completely.  Today I used a gluten free pie crust and adapted the filling recipe from here, and voila!-- Coconut Cream Pie for Coconut's birthday.

 Ingredients

1 blind-baked 9-inch pie shell (for gluten-free, I used the pie crust recipe on Pamela's GF bread mix)

2 1/4 cups whole milk
3/4 cup sugar
3 egg yolks
1/4 cup cornstarch
1 teaspoon vanilla
1 3/4 cups sweetened flaked coconut
1 tablespoon butter

1 cup heavy cream
powdered sugar to taste
pure vanilla extract to taste

 Directions

In a saucepan, whisk  2 cups of the milk and 1/2 cup of the sugar together. Place the pan over medium heat and bring the liquid up to a simmer.

Whisk the cornstarch and 1/4 cup remaining sugar together until no clumps remain.  Whisk in egg yolks and remaining 1/4 cup milk until smooth. Temper the hot milk into the egg yolks. Whisk the egg mixture into the hot milk mixture.  Bring the liquid up to a boil and reduce to a simmer. Cook the mixture, stirring constantly, until the filling is thick, about 4 to 6 minutes. (Optional: strain your mixture at this point.  The egg has a tendency to cook unevenly and this will eliminate any chunks.) Fold in the vanilla, coconut, and butter. Mix well. Pour the filling into the prepared crust, press plastic wrap directly on filling (this will prevent the cornstarch from forming a "skin"), and cool the pie completely.

Flavor the heavy cream with powdered sugar and vanilla (or other extract) to taste. Using an electric mixer with a whip attachment, whip the cream to stiff peaks, being careful not to over-whip.  Spread or pipe the whipped cream over the top of the pie.

Saturday, April 14, 2012

Dear Martha... (classic yellow cake batter/Swiss meringue buttercream)

Are you there, Martha?  It's me, Emily.  I know we don't have a mutually beneficial relationship.  In fact, you'd probably hate me seeing as I let my cat drink milk from my cereal bowl and I often leave the dishes for the next morning.  But you know what?  I don't like you trash talkin' my girl Rachael Ray, so maybe we'll call it even?

Thanks for the delish yellow cake recipe you recently published in Everyday Food and the Swiss meringue buttercream from your cupcake cookbook.  Work birthday parties wouldn't be the same without them.

XOXO,

Emily

Classic Yellow Cake Batter

You could actually turn this into a cake, but I'm going the cupcake route.  If you'd prefer a layer cake, use 2, 9-inch round cake pans lined with parchment paper and buttered.  Divide the batter among the two pans and bake about 30 minutes. 

I've recently discovered powdered buttermilk.  I know, I know, it's not 1950, but I'm sick of buying a quart whenever I make scones and pouring the leftovers down the drain a few weeks later.  Try it!

Remember that we're making meringue buttercream after, so don't throw away your extra egg whites.*

1 cup (2 sticks) unsalted butter, room temperature
1 3/4 cups sugar
4 large eggs plus two large egg yolks*
1 Tbs pure vanilla extract
3 cups cake flour (I've been using my GF mix), spooned and leveled
1 Tbs baking powder
1/2 tsp fine salt
1 1/2 cups buttermilk

Bring cold ingredients to room temperature.

Preheat oven to 350 F.  Line 24 standard muffin cups with paper liners. 

In a large bowl, using an electric mixer, beat butter and sugar on high until light and fluffy, about 6 minutes.  Beat in whole eggs and egg yolks, one at a time, until combined.  Beat in vanilla extract.

In another large bowl, whisk together flour, baking powder, and salt.

With the mixer on low, add 1/3 of the flour mixture to butter mixture, beating to combine.  Beat in 3/4 cup buttermilk, another 1/3 the flour mixture, another 3/4 cup buttermilk, and the remaining flour mixture until just combined.  Scrape down bowl as needed. 

Divide batter among muffin cups.  Bake until a toothpick inserted in center of a cupcake comes out with a few moist crumbs attached, about 20-25 minutes.

Swiss Meringue Buttercream

It's easier than Italian meringue and approximately a million steps up from the powdered sugar and shortening buttercream we grew up on.

5 large egg whites
1 cup plus 2 Tbs sugar
pinch of salt
1 pound (4 sticks) unsalted butter, cut into tablespoons, room temperature
1 1/2 tsp pure vanilla extract

Combine egg whites, sugar, and salt in the heatproof bowl of a standing mixer set over a pan of simmering water.  Whisk constantly by hand until mixture is warm to the touch and sugar has dissolved (the mixture should feel completely smooth when rubbed between your fingertips.)
Oregon Duckcakes

Attach the bowl to the mixer fitted with the whisk attachment.  Starting on low and gradually increasing to medium-high speed, whisk until stiff (but not dry) peaks form.  Continue mixing until the mixture if fluffy and glossy, and completely cool (test by touching the bottom of the bowl), about 10 minutes.

With the mixer on medium-low speed, add the butter a few tablespoons at a time, mixing well after each addition.  Once all the butter has been added, whisk in the vanilla.  Switch to the paddle attachment, and continue beating on low speed until all air bubbles are eliminated, about 2 minutes.  Scrape down sides of bowl with a flexible spatula, and continue beating until the frosting is completely smooth.  Keep buttercream at room temperature if using the same day, or transfer to an airtight container and refrigerate up to 3 days or freeze up to 1 month.  Before using, bring to room temperature and beat with paddle attachment on low speed until smooth again, about 5 minutes.

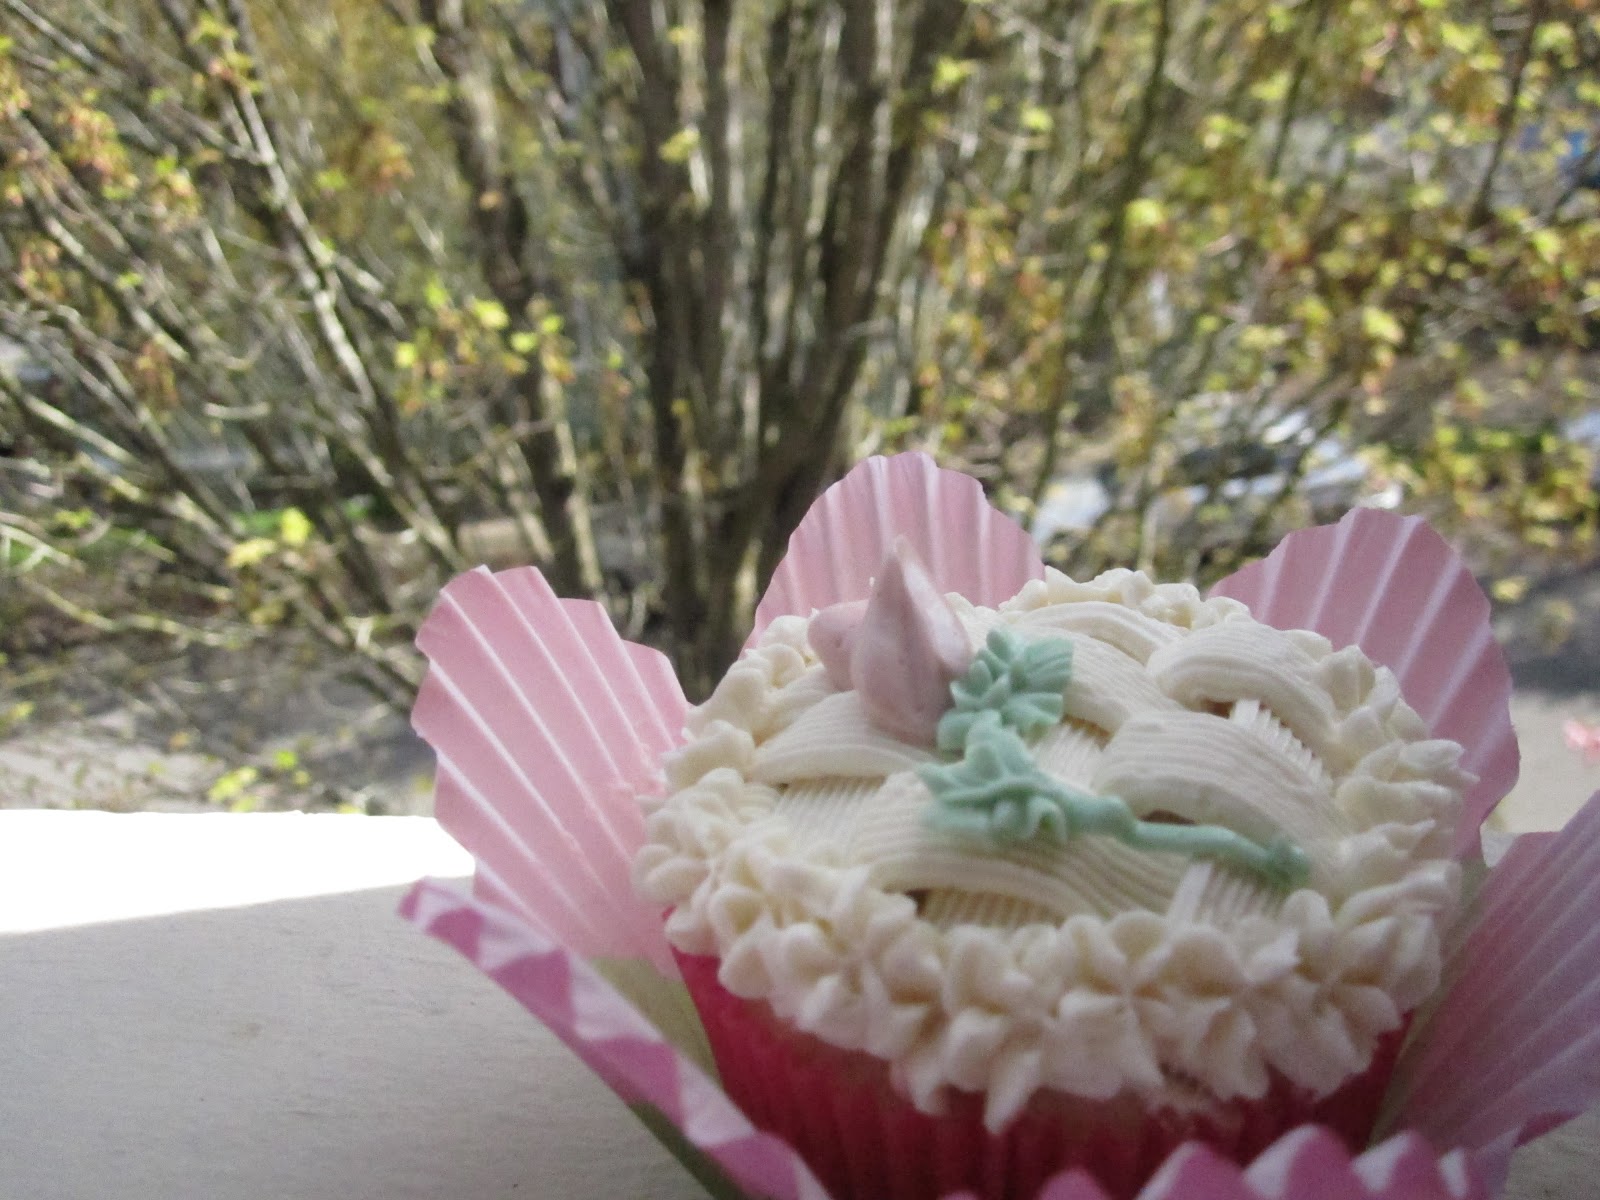
Flower Basket Cupcakes

Thursday, April 12, 2012

Toffee Crunch Cookie Brittle

When I was little (and adorable), I thought Heath Bars were "Health" Bars.  Once I figured out how to read and discovered that Heath Bars were in fact not Health Bars and that toffee was not coffee, I came to fully appreciate the delicious candy bar.

PS - what's not to love? They share a name with:
  1.  Heath Ledger (muah!) I'll always love a man with curly hair. 
  2. Ben & Jerry's Vanilla Heath Bar Crunch Ice Cream.  Oh, you didn't realize they made more than Coffee Heath Bar Crunch? I would like to thank my summer scooping overpriced ice cream at minor league baseball games for that discovery. 
  3. My sister's new boyfriend (!) who will have to listen to me reference Mr. Ledger and Heath Bars every time I say his name for the rest of his life. I apologize.
This recipe is from a cookbook called "Big Fat Cookies" by Elinor Klivans.  And yes, sometimes I read it in bed instead of an actual book.  Normally I'm skeptical of cookies without eggs, but my friend Dan wanted to make these for his mom when we were in college, and I couldn't get enough.

1 1/2 cups unbleached all-purpose flour (gluten free flour mix works here, too)
1/2 tsp baking soda
1/2 tsp salt
3/4 cups (1 1/2 sticks) unsalted butter, melted and cooled slightly
1/2 cup granulated sugar
1/3 cup packed light brown sugar
1 tsp vanilla extract
1 1/2 cups (about 7 oz) crushed chocolate-covered toffee, such as Heath Bars or Skor *
1 cup (about 4 oz) walnuts, broken into large pieces

* You can also buy packages of Heath Toffee Bits in the baking aisle.  They come in 8 oz bags and I figure a little extra toffee never hurt anyone, right? (Diabetics excluded.)

Position a rack in the middle of the oven.  Preheat the oven to 350°.  Line a baking sheet with parchment paper or a Silpat.

The dough will look crumbly.
In a medium bowl, stir the flour, baking soda, and salt together; set aside.  In a large bowl, whisk the melted butter, granulated sugar, brown sugar, and vanilla until smooth, about 30 seconds.  Use a large spoon to stir in the flour mixture.  The dough should look smooth.  Stir in the crushed toffee and walnuts.  The dough will look crumbly.

Leaving a 1 to 1 1/2-inch border empty on all sides, spoon the dough onto the prepared baking sheet.  Press the dough into a rectangle that measures about 9x13 inches and is about 1/2 inch thick, then use the palms of your hands to pat it into an even layer.

Bake until the top feels firm and looks dark golden and the edges look light brown, about 19 minutes.  Let the cookie brittle cool on the baking sheet for 10 minutes, then use a large metal spatula to slide the cookie onto a wire rack to cool.  (Don't worry if the cookie breaks; it will be broken into pieces when cool.)  The cookie will become crisp as it cools.

Break the cooled cookie into 4- to 5-inch pieces.  The cookies can be stored in a tightly covered container at room temperature for up to 4 days (but they won't last!)


Makes about twelve 4- to 5-inch long irregularly shaped cookies. 

Wednesday, February 8, 2012

Tamales!

I love (love, love, love!) tamales.  It's one of those dishes I'm kind of obligated to order when I see it on a menu.  You know, like creme brulee.  Irresistible. AKA it was high time for me to learn how to make them. 
  • 1/2 package dried corn husks
Masa Dough:
  • 2 cups masa
  • 1 teaspoon baking powder
  • 1/2 teaspoon salt
  • 1 teaspoon cumin
  • 1 teaspoon chili powder
  • 2 cups hot water
  • 1 vegetarian bouillon cube
  • 1 stick Butter
*Note - you could just use 2 cups of veggie broth here, if that's what you've got around the house. 

Start off by soaking your corn husks in hot water for 30 minutes.

In a separate bowl, add the masa, baking powder, salt, cumin, and chili powder.
Add 2 cups hot water (/veggie broth) to your mixture and form a dough.

Beat the stick of butter and bouillon cube using an electric mixer for about a minute until airy. Add the masa dough in and mix it up well again. Set your finished dough aside.

Filling:

I sauteed onions, roasted poblanos, sweet potatoes, and black beans, but you can dream up any combo of veggies and/or meat.  Use your imagination!

Assembly:

Take one of your soaked corn husks and spread a good amount of the masa mixture on top.
Next, take a spoonful of your veggie filling and place it down the middle third of your tamale. Make sure to leave a bit of space at the ends. Roll up the husk and tie the ends using strips of husk (they split really easily.)


Steam your tamales for 90 minutes.  I used an Asian-style bamboo steamer.  If you just got married and had a fancy-smancy stainless steamer on your registry, good for you.  If you're really out of luck, you can put together a makeshift steamer using a colander, large stock pot, and lid.  Check the water level periodically to make sure it doesn't boil away. The dough should be firm and pull away from the husk when your tamales are done. 

Unwrap and serve with your favorite toppings.  That's salsa, sour cream, scallions, and cilantro in my house. Enjoy!
 

Sunday, February 5, 2012

Gluten Free Fudgy Brownies

Sara G. and I did many a presentation on the health benefits of dark chocolate in college.  I know writing about the health benefits of brownies would really be stretching it, but hey, at least they're yummy in your tummy. And brownie batter does seem to work wonders on my mood.  Take that, nutrition!

My secret trick? Stirring in a few spoonfuls of raspberry jam and sprinkling mini chocolate chips on top before baking. 

1/2 cup butter
3 ounces unsweetened chocolate, coarsely chopped
1 cup sugar
2 eggs
1 teaspoon vanilla
1/3 cup brown rice flour
1/3 cup sorghum flour
heaping 1/4 teaspoon xanthan gum
1/4 teaspoon baking soda

1) In a double boiler melt butter and unsweetened chocolate over low heat, stirring constantly.  Remove from heat; cool. Or if you're impatient like I am, jump right to step 2.

2) Stir sugar into cooled chocolate mixture.  Add the eggs, one at a time, beating with a wooden spoon after each addition just until combined.  Stir in the vanilla.

3) In a small bowl stir together the flours, xanthan gum, and baking soda.  Add flour mixture to chocolate mixture; stir just until combined. 

4) Spread batter into an 8x8" square pan lined with parchment.  Bake in a 350° oven for 25 minutes.  Cool on a wire rack.

Friday, January 20, 2012

Chai Tea Concentrate

Chai tea at home, check! The next best thing? Licking that can of condensed milk clean! I found the recipe here and tweaked the spices/sugar content to my liking. 

(Penzeys is my favorite spice shop.)

1, 14-ounce can sweetened condensed milk
1 teaspoon cardamom
1/2 teaspoon nutmeg
1/2 teaspoon cloves
1/2 teaspoon cinnamon
1/4 teaspoon ginger

Empty condensed milk into a jar with a tight fitting lid. Stir in the spices.

To use: Brew a cup of strong black tea, then add two heaping teaspoons of concentrate or more to taste. Stir well until concentrate has fully melted.

To give: Pour into small jars with lids and tie with an attractive bow, or wrap the jar first. Attach a tag with instructions to keep the mix refrigerated and how to use it.

To keep: Store in refrigerator for up to 6 months.


See ya later, Starbucks!

Wednesday, January 18, 2012

(Gluten Free) Cookie Dough Cheesecake

My baking abilities were challenged when my doc suggested I go from my current 90% gluten free-ness to 100% for the sake of my poor, sluggish little thyroid.  Ugh.  Don't get me wrong, I make some de-lish GF brownies, but to do it all. the. time? Oh boy.

Luckily for me, I came across a recipe for an all purpose gluten free flour mix that you can sub 1:1 for good ol' wheat flour. A lifesaver! I'm spoiled in that I live 15 minutes from Bob's Red Mill and I can buy all these ingredients and more in their bulk section on the cheap.


1 1/4 C (170 g) brown rice flour
1 1/4 C (205 g) white rice flour
1 C (120 g) tapioca flour
1 C (165 g) sweet rice flour 

2 scant tsp. xanthan gum

Anyhoo, my work has implemented monthly themed potlucks.  Best idea EVER.  I wish it had been mine.  January's theme is "cozy comforts," ie - comfort food and comfy clothes.  And yes, we get to dress the part as long as we contribute food.  Hello, yoga pants and messy hair!

Two of my favorite things? 1) Cookie dough.  2) Cheesecake.  Naturally, I've been itching to try cookie dough cheesecake.  Even better? It will fall into the above mentioned comfort food category!


PART 1: COOKIE


To circle back around to gluten free, I've tried my favorite chocolate chip cookie recipe using the newly discovered GF flour blend.  I'm a fan of the Better Homes and Gardens ccc recipe; they call for half shortening and half butter -- I use all butter.  None of that fake stuff pour moi.
  • 1 cup butter, softened
  • 1 cup packed brown sugar
  • 1/2 cup granulated sugar
  • 1/2 teaspoon baking soda
  • 2 eggs
  • 1 teaspoon vanilla
  • 2 1/2 cups all-purpose flour (or the gluten free blend, in my case)
  • 1, 12-ounce package (2 cups) semisweet chocolate chips (I use the mini ones)
In a large mixing bowl beat butter with an electric mixer on medium to high speed for 30 seconds.  Add brown sugar, granulated sugar, and baking soda.  Beat until mixture is combined, scraping sides of bowl occasionally.  Beat in eggs and vanilla until combined.  Beat in as much of the flour as you can with the mixer.  Stir in any remaining flour.  Stir in chocolate chips.  

Since I made the cookie part half a week before I needed it, I decided to freeze it.  To make life easier on myself, I covered the base of my springform pan with Press'n Seal.  I spread some of the cookie dough on top of that (maybe half an inch high), then wrapped it and stashed it in the freezer--this will be the cheesecake crust.  Now I'll be able to pop it out of the freezer when I'm ready and it'll be the perfect shape for my pan! Some of the dough I shaped into small balls (like you'd find in cookie dough ice cream), and the rest I made a regular cookie size--the regular sized ones I'll save for a rainy day.  Which is every day in Portland.  Good thing I have a hearty appetite.

PART 2: CHEESECAKE

3, 8-ounce packages cream cheese, softened
1/4 cup sour cream, room temperature
1 cup sugar
2 Tablespoons all-purpose flour (or the gluten free blend, in my case)
1 teaspoon vanilla
3 large eggs


Preheat oven to 325° F.

In electric mixer, beat cream cheese and sour cream.  Add the sugar, flour, and vanilla and mix until combined.  Beat in eggs, one at a time.  


Now it's time to turn the cookie dough and cheesecake batter into...tah dah! COOKIE DOUGH CHEESECAKE!


1) Put a tea kettle/pot/water-filled vessel on the stove.  You'll need boiling water for a water bath. Double wrap the bottom of a springform pan with alumnium foil, and place it in a larger pan (Roasting pan? Sheet pan? Improvise if you have to.)


2) Get those handy-dandy wrapped cookie crust and mini cookie dough balls out of the freezer. 


3) Put the cookie dough crust in a 9-10" springform pan, followed by half the cheesecake batter, then half the mini cookie dough balls.  Top this with the remaining cheesecake batter, and the rest of the mini cookie dough balls.  This part will be showing so take time to arrange them nicely.  Press the mini cookie dough balls into the batter with your finger.


4) Bake in a water bath* at 325°F for 40-50 minutes, or until the cheesecake appears set (it shouldn't jiggle!)


*Water bath tip - assemble cheesecake, then put wrapped springform pan inside roasting pan.  Put it in the oven, and then pour the boiling water into the larger roasting pan.  I have a tendency to trip, and the last thing I'd want to do is trip with a big, open pan of boiling water in my hands.  Once the cheesecake is finished, you can lift the springform right out and let the pan of water cool in the oven before removing it.  No burns!

5) Cool on a wire rack.  Cover and let chill at least 4 hours, or overnight.  

PART 3: FROSTING

1, 8-ounce package cream cheese, room temperature
1 stick (8T) unsalted butter, room temperature
1 Tablespoon milk
1 teaspoon vanilla extract
~2 cups powdered sugar, sifted (I don't measure this...I just add it till it looks and tastes good.)


Mini chocolate chips, for decorating


Cream cream cheese and butter in an electric mixer using whisk attachment.  Add milk, vanilla, and powdered sugar.  Beat until smooth. 


Using a star tip, pipe frosting around the top of the cheesecake.  Sprinkle with chocolate chips and enjoy!


P.S. - You'll have extra frosting.  A darn shame.